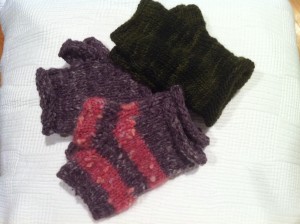
Protect Your Wrists from the Cold and Damp
In East Asian Medicine, there is a type of pain called wind cold damp painful obstruction. It’s exactly what it sounds like: wind, cold and damp get into your body, especially your joints, and cause an obstruction of your qi which is painful. This is rampant in areas like Seattle in the winter. The easiest way to prevent it is to deny it access by keeping yourself properly bundled during the cold, damp, windy weather. Wrist warmers are a great option if you like having your fingers free of gloves or need their dexterity in the cold but don’t want to expose your entire hand. They also work great for adding just the perfect bit of warmth when you’re sitting in a cold classroom or office building without putting your coat on.
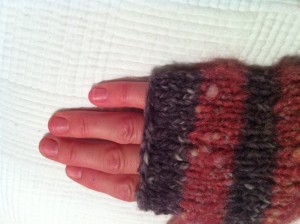
These wrist warmers use worsted weight yarn which knits very quickly. They make a great gift for others or a nice treat for yourself and are easy enough for a beginner. To do this pattern, you only need to know how to knit and how to do yarn overs, which is just wrapping the yarn around the needle in between stitches from back to front in order to add a stitch. If you want to add stripes, pick up a contrasting yarn or yarns of the same gauge and start and end them as you please throughout the pattern, taking care to leave 2-3 inches of tail to weave in in order to prevent unraveling. Pick a yarn made of natural wool for the best temperature regulating results (not to mention the other benefits of natural fibers). There are some great blends, like the pink wool/angora/acrylic yarn I used for stripes. Another great benefit of using wool is that you can spit splice it. This is pretty much what it sounds like. When you run out of yarn in the middle of a project, join the ends of the old and new wool by unraveling the strands about an inch, spitting on them, twining all of the ends together, then rubbing them together briskly on a frictiony surface such as your pant leg. I find blue jeans work best.
Materials:
- 9 US/5.5 metric gauge double-pointed needles (or the size of needles you need to knit 4 stitches per inch)
- worsted weight yarn
- stitch marker and stitch holders or about 6 inches of spare yarn (preferably contrasting)
- crochet hook or tapestry needle to weave in ends (optional, but so much easier than using knitting needles)
Abbreviations:
- BO=bind off
- CO=cast on
- inc=increase
- K=knit
- st/sts=stitch/es
- YO=yarn over
The Pattern:
Cast on 28 stitches (7 per needle). Work in the round for the desired length from above the wrist to the proximal joint of the thumb (where the web joins the rest of your hand), about 3 inches for a small to medium hand, unless you want to cover more of your forearm–just make sure you picked up enough yarn of the same dye lot. I once made a pair that goes all the way over my elbows. Place a stitch marker (or a small loop of a contrasting color of yarn–make sure not to knit it!) at the beginning of the row if desired (this requires shifting a st one way or the other on your first or fourth needle). In this pattern, I just kept track of the tail of yarn hanging between the first and fourth needles without shifting any sts.
Increase rows: All increases are done on the first needle/at the beginning of a new round.
- K 1, YO, K to end of round
- K 1, YO, K 1, YO, K to end of round
- K 1, YO, K n, YO, K to end of round (n increases by 2 every round and will always be an odd number)
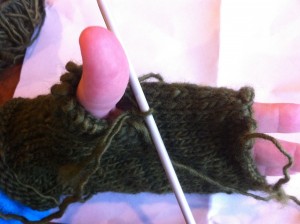
Work these increases until you have 11 sts for the thumb gusset, including the yarn overs as sts. Next row, K1 and place the thumb sts onto a string holder or an extra length of yarn to prevent stretching. Using a contrasting color can help you to distinguish them later. Join the one st from the first needle to the remaining sts on that needle and K in the round until you’ve reached the desired length up the hand and around the fingers, about 2 inches for a small to medium hand. I stopped when the sts reached the middle joint of the pinkie. BO all sts.
Working the Thumb: Pick up and knit a 12th st into the existing sts where the web of the thumb joins the hand.
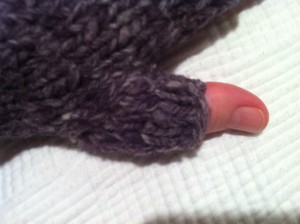
Pick up the set aside thumb sts and return them to the needles, splitting them evenly. K in the round for the desired length up the thumb, about 1/2 inch. I stopped at the base of the distal joint of the thumb. BO all sts.
Use the crochet hook to weave in yarn ends on the wrong side of the wrist warmers, and you’re done.
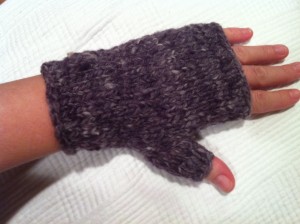
Wear them in good, warm health!

